Interactive Notebooks: Tips for Success
By MARISSA DESPINS Updated April 10, 2024
Are you interested in testing out Interactive Notebooks in your elementary or middle school classroom? Looking for tips and tricks for successful implementation? I am here to help!
If you were a follower of my previous blog, it should be no surprise to you how much I love using Interactive Notebooks in my classroom. I remember when I first saw them used in the Science classroom down the hall from me. It only took one look and I was sold. I loved the way they kept the kids organized, and how the kids had a record of their learning that showed growth over time. The next year, I began implementing them with my own students. I have been using them ever since.
For print-and-teach Interactive Notebook resources that you can download and use right away with your learners, click on the image or button below!
How can I effectively use Interactive Notebooks in the Classroom?
I will admit that using Interactive Notebooks in my classroom has been a huge work in progress. I have had many hiccups along the way, but have found that the benefits have made all of the work worth it. Over the years, I have used Interactive Notebooks with elementary, middle, and high school students. I have learned that Interactive Notebooks are certainly not just for elementary students. My middle and high school students eagerly awaited opportunities to participate in anything interactive. In all grade levels, I have found that this different way of structuring our learning shakes things up a bit. This is exactly what a lot of my disengaged learners need – no matter what grade they are in. Because of this, I am hugely passionate about using them with my students.
What are the Benefits of using Interactive Notebooks?
Research has shown many benefits to using Interactive Notebooks. To me, however, the very best part of using Interactive Notebooks in my classroom is that they promote engagement, creativity, and analytical thinking. These are all things I strive for in my classroom. Interactive Notebooks keep my struggling students organized, make differentiating for my higher learners a breeze, provide a record of our learning, and become a student-created reference tool to refer back to when needed – honestly, I can’t imagine how I ever structured my classes without them.
Looking for more information? Check out these top benefits!
What are some Tips and Tricks for Interactive Notebooks?
There was definitely a learning curve for me to climb when I first started using Interactive Notebooks in the classroom. At the time, they were still fairly new. There really wasn’t a lot of information out there to help me get started, and troubleshoot when things were not going well (spoiler alert – this happened a lot!) I really wish I had few tips before getting started, as it would have caused me to bypass some of the wrong turns I made along the way. Because of this, I thought I would round up some of my best tips and tricks and share them with you all here.
Tip #1 – Keytab style notebooks work best.
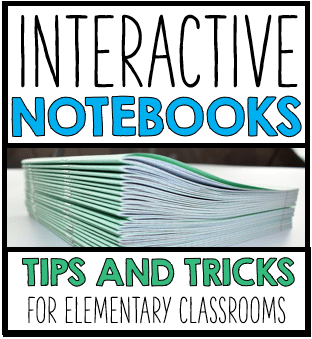
I have tried using several different notebooks styles with my students. However, I have found Keytabs to work best. The hard covered composition books are great too, but they can be much more expensive. If you plan on using a new notebook for each unit, like I do, the cost can really add up. Keytabs, however, are really inexpensive. At the end of August, I can pick up huge stacks of them at Staples for 12 cents each for a pack of 4. I ask my students to bring in their own Keytabs as well, but it is always good to have a back up supply for those who forget.
Why should I use Keytabs for my Interactive Notebooks?
Keytabs are also great because the paper inside is the same size as a regular sheet of loose leaf. This is beneficial, because it means that you don’t have to reformat all of your handouts to fit inside the notebooks. Composition book pages are smaller, making re-sizing necessary. I know some teachers have their students fold their pages before gluing them into composition books. I, however, really like to see all of the pages clearly without having to unfold everything. Also, less trimming of paper means less mess all over the floor, and more time for learning. This sounds like a win to me.
I also like using Keytabs because of the number of pages they have. They have fewer pages than composition books. This is nice when using them for individual units. I don’t like having to waste a bunch of extra pages at the back of each book. If I do end up needing more pages, it is super easy to attach multiple Keytabs together. I simply use a strip of fun colored duct tape to bind the spines together. It adds a punch of color, and the books hold up really well.
Tip #2 – You will need a lot of glue sticks!
If you think you have enough glue sticks to get your class started, buy 30 more. You will be shocked at the amount of glue sticks you will go through! Every year it seriously feels like I am always buying and hoarding glue sticks.
I have tried using the bottles of white glue, and know a lot of teachers who have had huge success with them, but they have not worked for me. I find them to be too messy, and the kids are forever forgetting to do up the lids. This means I am always dealing with clogged bottles. While the glue sticks can be a bit more expensive, I find that their ease of use makes it more than worthwhile. I know that many have found that glue sticks are not strong enough to hold items inside their notebooks, but I have honestly never found this to be a problem. Glue sticks are more expensive though, so you may want to have your students bring in their own and use yours as backups.
Tip #3 – When possible, pre-cut!
Am I the only one who finds their students lack of cutting skills to be appalling? I know, I know, kids need practice. But honestly, because I like to have everything in their notebooks neat and tidy I pre-cut notebook materials whenever I can. The kids are usually ok with cutting out a basic worksheet, but when foldables or small pieces of paper are required, I try and cut out the materials before class starts. When it comes to small pieces, the elementary kiddos inevitably lose them, cut them in half, wad them up and fling them across the room… you know the drill. Sometimes it is just easier in the long run to do it yourself.
Sometimes time constraints make this difficult. However, things tend to go much smoother when I do get the chance. This can be a great job for peer tutors, parent volunteers, or students who finish early! Cutting can also be time consuming – pre-cutting helps save valuable class time!
Tip #4 – Use a “tidy tub”.
I am not sure where I first heard of this, but I absolutely love the idea. I have had great success with it in my classroom. Basically, you place a small bin, or “tidy tub” in the middle of each group of desks in your classroom. When cutting, have students place their leftover scraps into the bin. This keeps the garbage off the floor. It also prevents students from getting up every two minutes to go to the recycling bin. At the end of class, designate one kid from each group to get up and empty the tub into the recycling bin. This saves tons of time, and works really, really well. Also, if a kiddo loses a piece, they know where to look, instead of rummaging through the gross classroom garbage.
Tip #5 – Be realistic!
As I mentioned earlier, integrating Interactive Notebooks into your classroom takes significant thought and planning. No matter how enthusiastic you are about implementing them, they can quickly become overwhelming if you don’t have a plan. Be kind to yourself – everything you do does not need to be pinterest-worthy! Not everything you put into your notebooks is going to look beautiful and perfect; real learning can be a messy process, and sometimes your student’s notebooks will reflect this. You may want to start small, and only do one Interactive Notebook unit to start with. This will help you get into the groove, and feel out if you think it will work for you. Later, after you have worked out the kinks, you can slowly add more and more Interactive Notebook units.
Tip #6 – Make (or purchase) some “go to” graphic organizers and templates for Interactive Notebooks
Before you get started, make sure you have a variety of graphic organizers to work with. It is a good idea to find some tried and true resources you are already comfortable with, and find a way to adapt them for use in Interactive Notebooks. Remember, not everything has to be fancy! There are a ton of awesome Interactive Notebook resources already available at Teachers Pay Teachers to help make your life easier – check mine out here! I have also included some FREE Interactive Notebook resources at the bottom of this post!
Tip #7 – Create a “Master Teacher Notebook”.
As you work through each Interactive Notebook unit with your students, create a “Master Teacher Notebook” alongside them. This allows you to model the process, and show students exactly what you are looking for. As a teacher, it allows you to focus specifically on what you want each page to look like. Having a model for students to refer to helps to avoid a lot of questions about particular aspects of page setup, giving you more time to help kids. An added bonus is that it become a really helpful resource for students to access when they are away – they simply need to check the master notebook to see what work they have missed, and what resources they need to pick up.
Tip #8 – Remember that organization is a learned skill.
Teaching students to organize their notebooks in the way you would like will take time. There is only a very small percentage of the population who have natural organizational skills – the rest of us need tools, instruction, modeling, and a whole lot of nagging to keep things neat and tidy. Overtime this will get easier, but it does take time. Whenever you get frustrated, it is good to remember that the organizational skills you teach your students will carry over into their future classes, making them much more successful students in the future.
Looking for more organization ideas? Check out our favorite classroom organization hacks!
Tip #9 – Have all supplies ready to go.
As much as I like to have my students come prepared each class with the scissors, glue sticks, and markers, I can guarantee that someone (usually quite a few someones) forgets something. I make sure I have a supply of scissors, glue sticks, and markers in tubs along the back shelf of my classroom. If kids forget their supplies, they know exactly where to go to grab what they need. This saves a significant amount of class time, and makes the construction of our Interactive Notebooks so much easier.
Tip #10 – Teach and model expectations for Interactive Notebook success.
To make things run smoothly, you will need to teach and model routines, expectations, and material management. The end goal should be that students can construct their notebooks independently. It takes time, and a lot of modeling, but eventually students should be able to put together their notebooks without a lot of adult intervention. The more your students get familiar with using their notebooks, the easier and faster the process will get. As with all things in the classroom, the more time you spend at the start of the year teaching and modeling rules and expectations, the easier things will be later on.
Hopefully these tips help you to get things started with Interactive Notebooks in your classroom. Do you have any additional tips or tricks? Leave me a comment in the section below – I would love to hear and learn from your ideas!
As promised, I have included some of my very favourite Interactive Notebook resources for FREE in the download below! The free download contains a variety of different foldables, graphic organizers, and one pagers from some of my best selling TPT products! Simply click on the image below to download now!
Looking for more Interactive Notebook Information?
Check out some of my other posts here:
Click on the links below to go directly to my previous posts on Interactive Notebooks.
Interactive Notebooks: What are they?
Interactive Notebooks: What are the Benefits of using them in your classroom?
Interactive Notebooks: Tips and Tricks
Interested in signing up for my email list?
If you are interested in signing up for my email list, you can do so by clicking on the link below. I periodically send out emails with free resources, teaching tips, and exclusive deals. Signing up will also give you immediate access to some of my best selling Interactive Notebook resources – foldable projects, graphic organizers, and other fun activities.


